Gastroduodenoscopy (OGD)
- Check your endoscope to ensure that it is sucking and blowing and take the wheel lock off and ensure picture is coming with correct name of the patient on the screen and proceed.
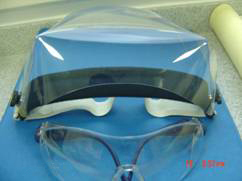
- Ensure correct PPE ( personal protection equipment) are worn- plastic gown and disposable gloves must be worn at all times.Use additional protection with full sleeve gown and eye goggles when appropriate.
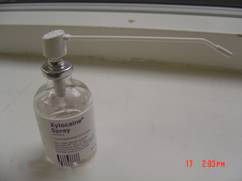
- Warn the patient that the local anaesthetic spray tastes strange but does not last long. Spray the back of the throat approx 8-10 times (each spray is 10mg)- 4-5 sprays in two go’s.
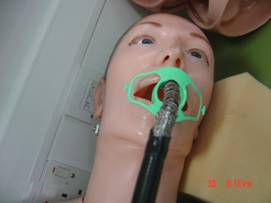
- Get the patient into position- left lateral
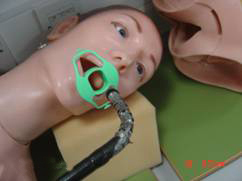
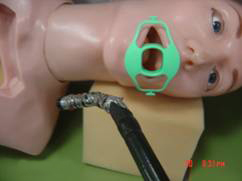
- The head end nurse will place a secretion holder around the neck, attach the oxygen prongs, get ready with the Yankauer suction probe and place a mouth guard
- If patient opts for sedation ensure that observations (BP, pulse and oxygen saturation) are ok before you administer sedation
- The sedation is normally iv midazolam 2-5mg. Wait for 2 minutes before you start
- Once the patient is ready and sedated, smear the tip of the scope (up to 10cm) with KY jelly but avoiding the lenses and take up the scope holding the endoscope 20cm from the tip.
- Ensure you are holding the scope with axis aligning with the patient’s oesophagus- otherwise when you enter you will see only teeth on one side
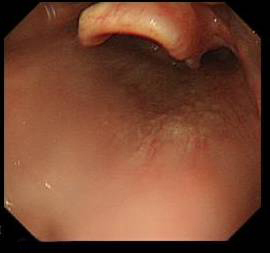
Correct entry- both right and left side are seen- Tongue at top , shiny palate at bottom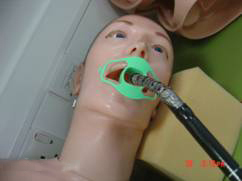
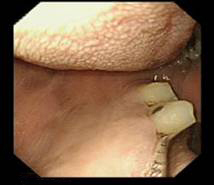
Incorrect entry- only one side is seen - On the screen you will see the tongue on top and palate on the bottom
Tongue at top , shiny palate at bottom - Remember -Thumb down on the big wheel makes the tip to go up on the screen ( imagine the hand picture) but in 3 D actually the tip goes down
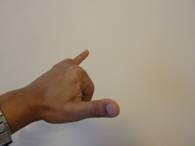
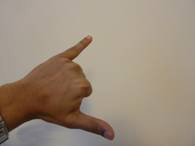
Thumb down on big wheel make the scope tip ( little finger) go up on the screen ( not in real 3D- in real 3D the tip goes down)
- Bend the tip of the scope so as to match the curvature of the tongue.
- As soon the tip reaches the back of the oropharynx – unbend the tip towards the posterior wall of the pharynx.
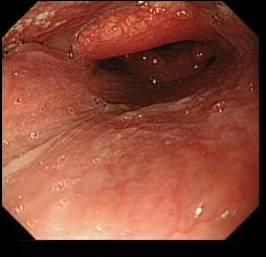
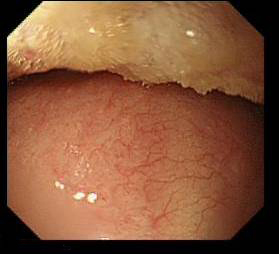
Vocal cord visible distal to epiglottis in the second picture but not in the first - Next you see the epiglottis hiding the entrance to the larynx and oesophagus
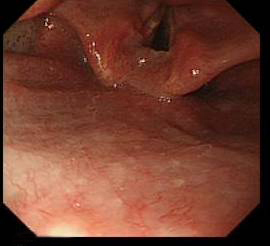
- Once you pass the epiglottis you will see the entry to the trachea (laryngeal inlet) guarded by the vocal cords
- Once here, choose either left or right side – behind the aryepiglottic fold
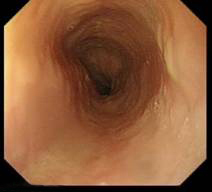
- At this stage there will be red out- if you wait you will see the cricopharyngeus opening. Beware of pharyngeal pouch and don’t push hard, just gently glide
- Inflate while in oesophagus and go down
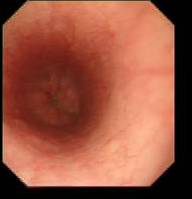
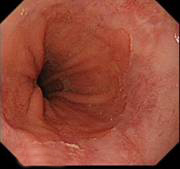
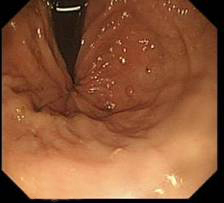
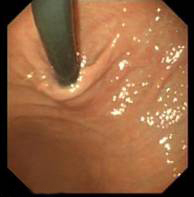
- Next comes the GOJ – note the distance from the incisor from the marking on the scope- here the pearl white squamous mucosa meets with pink columnar mucosa at the Z line
- Normally the Z line and the GOJ and the diaphragmatic hiatus all will be at the same level
- If there is a sliding hiatal hernia GOJ slips up in the thorax – so the GOJ looks wide and patent. So you will see proximal to distal- the Z line – after that you will see the gastric rugae inside the hiatal hernia- and then a further narrowing- the diaphragmatic gap (which contracts and relaxes on breathing)

Different degrees of sliding hiatal hernia- small, medium and long length hiatus hernia - Familiarise yourself with concept of rolling and sliding hiatal hernia (read module on hiatus hernia)
- Barretts epithelium- pink columnar epithelium above the GO junction (i.e. proximal to the gastric rugal folds)
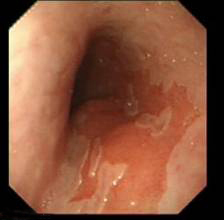
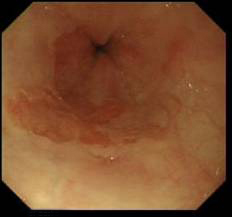
- Sometime Barrett and hiatal hernia can co-exist- remember gastric rugae are not visualized in the Barrett’s segment but is visualized in hiatal segment. Also the apparent narrowing of start of stomach in the beginning of the hiatal segment does not contract and relax with respiration but the diaphragmatic opening does. (read the Barrett’s oesophagus module)
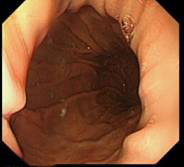
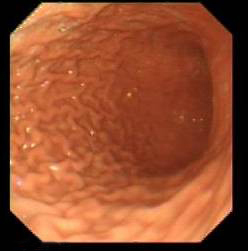
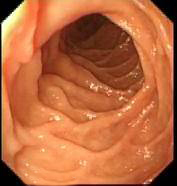
- In the fundus – see rugae- blow air sufficiently to distend stomach
- For the very beginner – trouble to find direction for pylorus – follow the convergence of the rughae- normally down and to the right
- Beware of rolling hiatal hernia- if you just entered the stomach beyond GOJ and can’t see any way forward you may be in a rolling hiatal hernia, just withdraw and start again.
- Understand the areas of the stomach if needed from an anatomy text book- roughly greater curve at the bottom, lesser curve at top the post surface is between greater curve and lesser curve and on the right side, anterior stomach is on the left side
- The technique of pyloric intubation- wait patiently for the pylorus to open up- sometime you will have to deflate the stomach a little
- Minor adjusment with small and large wheel usually leads to pyloric intubation. Diaphagmatic movement and pyloric peristalsis can sometime make pyloric intubation difficult.
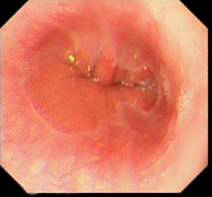
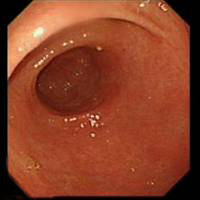
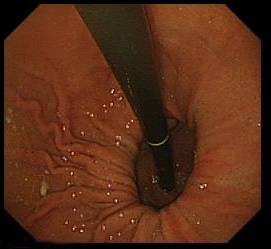
- Once in the D1 – withdraw to get a bird’s eye view of D1 (duodenal cap)
Duodenal cap – D1/D2 junction on the right - Be aware of the anatomical areas for description of lesion in the duodenum
- Technique of going to D2- tip down ( thumb up) and right turn ( small wheel away from you) and then right torque with your shoulder
- Control big wheel by thumb of left hand but control small wheel by thumb and other fingers of the dominant hand ( for beginners)
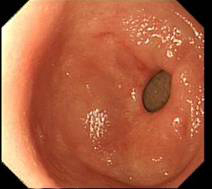
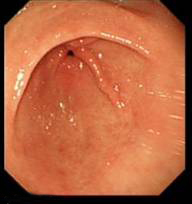
Second part of Duodenum- D2 - Ampulla will be on the left

Ampulla-just visible in D2 at 7o’clock - In D2 withdrawing the scope will allow you to move forward ( because the loop in the greater curvature is straightened up)
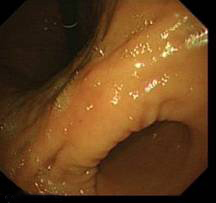
- Withdraw carefully in to D1 -the blind spot is the junction and superior and posterior wall
- Withdraw back in stomach and do a careful examination of the mucosa- lesser curve is the blind spot- be careful not to miss any lesion here
- Doing the J manoeuvre – once you see the incisura at the top of the screen – tip up ( by thumb down on the big wheel)
Incisura ( semilunar fold) at the top - Then pull the scope out slightly- you might have to rotate the scope

- Now you can see the fundus from below
- If there is hiatal hernia- the diaphragmatic defect will not grasp the scope tightly leaving a gap (compare with the picture just above)

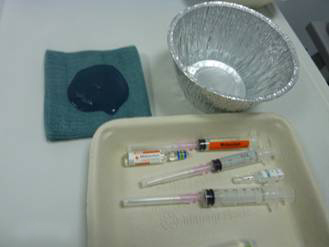
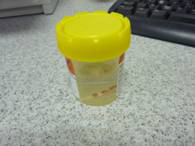
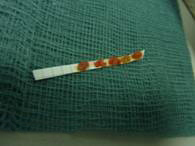
Both sliding and rolling hernia visible on J manoeuvre - D2 biopsies- nomally taken in iron deficiency anaemia or history of weight loss- four pieces of tissue is needed. Biopsies are taken in formalin pot ( colonic biopsies are sometime taken in a strip – as shown on the right hand picture)
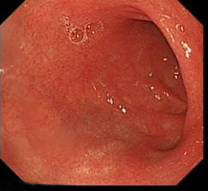
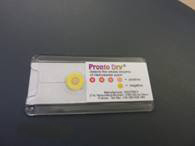
- H Pylori rapid urease test – (CLO/ Pronto Dry)- you need two pieces of tissue. If patient is on PPI take the sample from fundus as H Pylori migrates up. Remember formalin in the biopsy pot can kill it. So either do this test before you take other biopsies or wash the biopsy tip well
- Taking oesophageal biopsies can be difficult for the beginners as the biopsy forceps come out tangentially to the mucosa. Tip: Go above the lesion slightly and use the wheels to angulate the tip- might have to use wheel lock. For Barrett’s oesophagus – quadrantic biopsies every two centimetres.