


OUT OF HOURS ENDOSCOPY: Setting up the scope from scratch
The module covers:
- What do you need
- Endoscope
- Trolley or so called ‘stack’- processor and video display unit ( for out of hours scope both are in same trolley but normally video is on the opposite side of the patient compared to the processor trolley)
- How to set it up from scratch
- Endoscope
- Remove the chosen endoscope from the UV cabinet after disconnecting the tubing- wear gloves
- Put it in a clean tray along with the buttons ( air/water and suction button, pre-cleaning tubing and flushing valve) and covered with green tray cover
- For Pentax both video processor and the light source are housed in the same box ( see picture below). So after removing the soaking cap from the PVE end and insert the end to the combined video processor cum light source box.
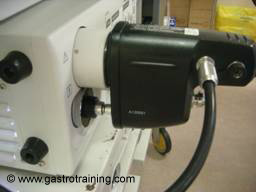
- For Olympus scopes video processor is separate from the light source, kept on the top of the light source box and is connected to the electrical connection ring on the right side of the expanded end of the umbilicus (ie PVE end) of the scope via a curly cable ( see picture below)

- Attach suction and water feed
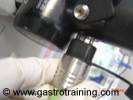
- Attach the suction tube to the suction port ( on the left of the expanded end of the umbilical cord ie PVE connector -looking from above- see the picture below)- the suction is normally provided by a stand alone suction unit but from wall sucker in out of hours emergency scopes
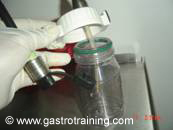
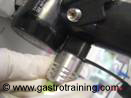
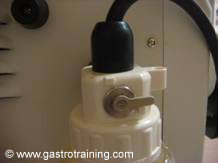
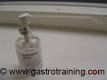
- Fill the water bottle with the required amount of water and clip it to the side of the processor and attach it to the water port ( simple push in for Pentax and push-turn-push for Olympus scopes).Turn the valve on, located on the bottle for Pentax scopes. You should hear hissing sound as air escapes from the air/water port on the control section of the scope.
Picture 15: Connection of a Pentax endoscope: Water bottle needs to be filled to proper level and valve turned on
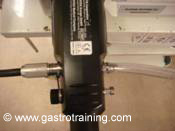
Picture 15: Connection of a Olympus endoscope: Water bottle needs to be filled to proper level
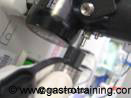
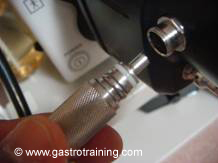
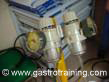
Picture16 :To attach air/water cable for Olympus -push- clockwise turn-push again - Processor
- Switch on the processor ( single switch for Pentax but for Olympus you need to switch on both video processor, light source separately plus there is a master switch on the top panel and registrars have been fooled for long time during out of hour endoscopy when clever endoscopy nurses are not around to show the ropes!)
- Enter the patient details on the keyboard if picture is needed ( not done in out of hours emergency endoscopy)
- White balance- put the tip of the scope inside the white balance tube and press white balance- the screen will show when it is complete
- Remember to switch on the suction from the wall/ from the stand alone suction machine- you hear a second hissing sound
- Checking before you start
- Check scope is sucking and blowing air and water by pressing the respective buttons- if suction is not working – check suction is on both in the periphery and also on the processor or whether biopsy valve is missing or the suction bottle is full and needs emptying
- Take any locks off on the control knob and any stiffening off ( for variable stiffening colonoscope)
- Ensure biopsy cap is in place
- Ensure the air/pump pressure is set as wanted ( keep it low for colonoscopy/flexible sigmoidoscopy)
- Once you finish proceed to immediate pre-cleaning ( see the chapter on How to clean an endoscope)
- Switch off the processor and the light source
- Detach the water pipe and the suction tube ( after switching off the suction)
- Remove the scope from the processor and put the soaking cap on
- Cover the tray with red cover and take it to the decontamination area
- Don’t forget to log the scope number with patient ID label.
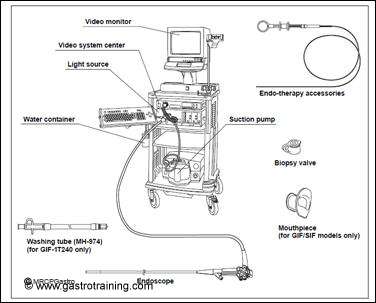
Picture 1: The stack/trolley, the endoscope and the other accessories: Courtesy Olympus
Picture 17: Switch off air/water pump and remove the tube

Few other bits and bobs you must remember before setting off:
Trouble shooting
- No air
- The air pump is not switched on – press low/med/high button on the light source
- The air/Water valve is damaged- replace it
- Outlet nozzle at distal end is blocked- flush through the biopsy channel
- No water delivery
- As above and also
- No sterile water in the water container- fill 2/3rd with sterile water
- No suction
- Biopsy valve is not attached/damaged
- Suction pump is not working- check suction setting
- Suction channel is blocked- brush or flush suction channel
- Air/water or suction valve is sticky- replace /clean
- Air/Water or suction valve is not fitting- wrong valve or damaged- replace
- No image
- Power switch not on- switch on
- The scope not slotted in properly into the processor- reattach
- Break in the cable- commonly at the junction of the control section and the insertion tube- send to factory
- Connection to the video monitor loose- reattach
- Image hazy- objective lens dirty- clean or flush
- Image colour strange- white balance was not done properly
